How to Fold an Origami Paper Crane

The following steps correspond to the images below. Read the images top left first, top right second, second left third, second right fourth and so on.
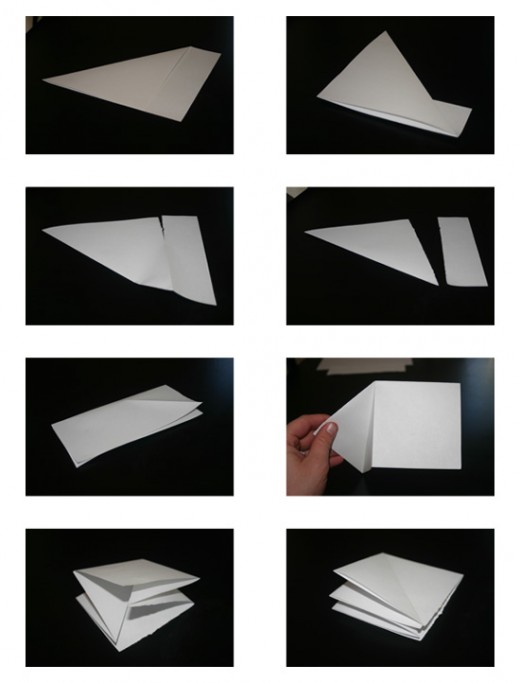
1. Fold the paper where the top edge meets the side edge. Make sure the point is perfect.
2. Fold the bottom strip of paper along the edge of what was just folded down. The idea is to have a perfectly square piece of paper. You may want to fold this rectangle piece back and forth several times to make it easier to tear.
3. Tear the rectangle piece free from the rest of the page.
4. When you open the page back up, you should have a perfect square. Discard the little rectangle piece.
5. Open the square paper and smooth out the diagonal crease. Fold the paper in half and make a good sharp crease. Open the paper again and fold it in half the other way perpendicular to the previous crease. You will now have 3 creases: One across, one up and down and one diagonally.
6. With the paper folded in half, grab the spine with both hands (with your first finger and thumb of both hands) one hand on either side of the up and down crease. Push both hands down. The up and down crease should push itself out on moth sides of the paper. Make creases on the inside of each side.
7. You should have a diamond shape with a total of four flaps.
8. Fold one flap over so one side has three flaps and the other only has one.
Folding a Paper Crane Part One
The following steps correspond to the images below. Read the images top left first, top right second, second left third, second right fourth and so on.
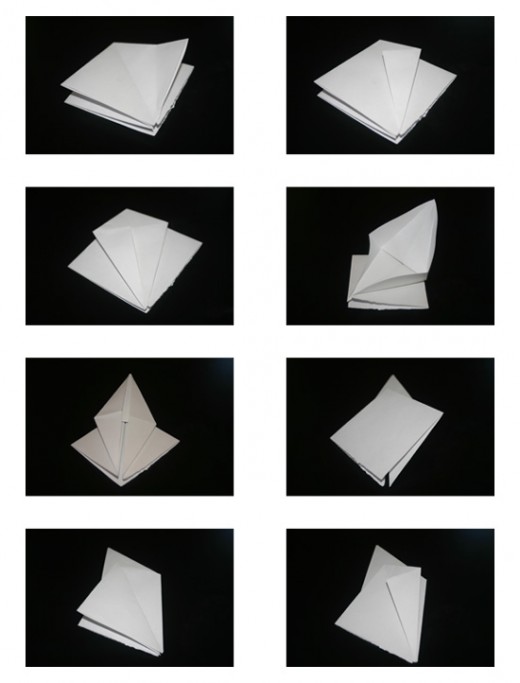
9. Unfold the flap that you just folded to reveal the crease down the center of the diamond.
10. Fold the corner of the diamond up towards the top point, kind of like making a paper airplane.
11. Fold the opposite corner the same way
12. Grab the bottom corner and, allowing the two flaps you just folded open up, pull the corner over the top point. Creasing it about three-fourths of the way up the diamond.
13. Now you can flatten the sides against the newly created stretched diamond.
14. Flip the Whole thing over, then do the exact same thing to the opposite side.
15. Fold the right flap over to create a crease down the middle.
16. Open it back up and fold the corner up towards the middle like you are folding a paper airplane.
Folding a Paper Crane Part 2 - Let's Keep Folding
The following steps correspond to the images below. Read the images top left first, top right second, second left third, second right fourth and so on.
17. Fold the opposite corner the same way completing the paper airplane-like fold.
18. Grab the bottom corner and, like the other side, allow the two flaps you just folded open up, and pull the corner over the top point, creasing it about three-fourths of the way up the diamond.
19. Now you can flatten the sides against the second stretched diamond.
20. Take the two side corners in the front and make them touch, then take the two back corners and make them touch. You should now have something that looks like a dog with its ears pointing strait up.
21. Take one corner and fold it towards the center crease, adgain like you were folding a paper airplane.
22. Do the Same thing to the other corner.
23. Flip the whole thing over. We are going to do the same thing to the other side.
24. Fold the corner towards the center crease like you were folding a paper airplane.
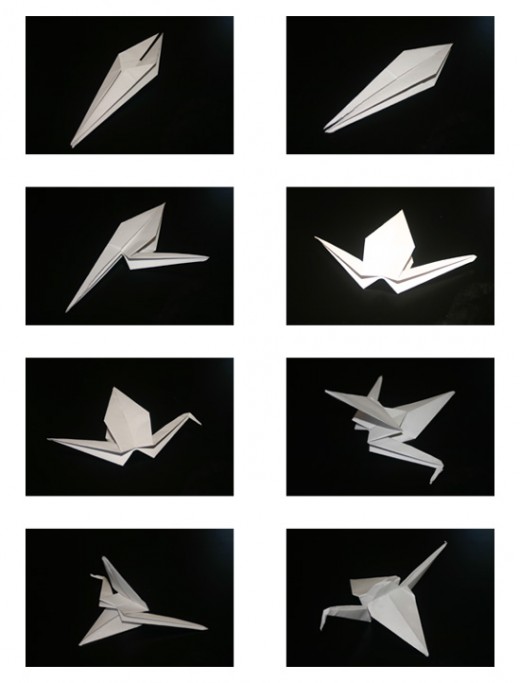
Folding a Paper Crane Part Three

The following steps correspond to the images below. Read the images top left first, top right second, second left third, second right fourth and so on.
25. Fold the opposite corner the same way completing the paper airplane-like fold.
26. Grab the side corners on the front and make them touch. Then grab the side corners on the back and make them touch. There should be two legs that extend downward.
27. Grab one of the legs and pull it outward, allowing the side to open slightly so you can invert the fold to make the neck of the crane,
28. Do the same thing to the other leg to make the tail of the crane.
29. Invert a small section on the neck to mimic the head of the crane. If you did it right, the nose should be a perfectly sharp point.
30. Bend the center flap down to create the wing, then turn the bird over.
31. Bend the other flap down to create the other wing.
32. The last step is to get rid of the point on the cranes back. If you pull out on the sides of the point, you will be able to press the point inwards, hiding the point inside the crane.
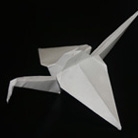
That’s it. You made your own crane. I hope my instructions were easy enough to follow. The pictures should have helped.
Folding a Paper Crane Part Four